
As an Amazon Associate, I earn from qualifying purchases.
Unlock the secrets of perfect grilling with our comprehensive guide on how to use a chimney starter for charcoal. Elevate your BBQ game today!
Step-by-Step Guide to Using a Chimney Starter for Charcoal
Grilling suckers, hear up! If you are tired of the hassle and implicit hazards of using lighter fluid to enkindle your watercolor, it’s time to switch to a chimney stack starter. This nifty tool not only makes the process safer but also ensures a more effective and indeed ignition of your watercolor. So, snare your tools and accouterments, and let’s dive into a step-by-step companion on how to use a chimney stack starter for watercolor.
From preparing your caff to conforming the temperature, we have got you covered. Let’s fire up that caff and get cuisine! Benefits of Using a Chimney Stack Starter for Charcoal Quick and Indeed Ignition Are you tired of waiting for your watercolor to light up unevenly, only to end up with hot and cold spots on your caff? Using a chimney stack starter for watercolor solves this problem painlessly.
With its effective tailwind design, the watercolor ignites snappily and unevenly, icing harmonious heat distribution. Say farewell to unevenly cooked food and welcome to impeccably grilled delights every time you fire up the caff.
No Need for Lighter Fluid Say farewell to the hassle and implicit hazards of using lighter fluid to enkindle your watercolor. By concluding for a chimney stack starter, you exclude the need for lighter fluid altogether. This means no further worries about a chemical taste moping on your grilled food or safety pitfalls associated with ignitable liquids. Enjoy a cleaner and better-tasting grilling experience without compromising on safety.
Easy Monitoring of Charcoal Readiness Have you ever plodded to gauge when your watercolor is ready for cooking? With a chimney stack starter, covering the readiness of your watercolor becomes a breath. Simply keep an eye on the watercolor through the chimney stack reflections as it heats up. Once the coals turn red-hot and ash over, you know they are ready to be transferred to the caff.
This position of control ensures perfection and thickness in your grilling, making the process smoother and more pleasurable. Enhanced Safety and Peace of Mind Grilling should be a fun and pleasurable experience, free from safety enterprises. Using a chimney stack starter for watercolor not only makes the ignition process safer but also provides peace of mind.
By following safety considerations similar to using heat-resistant gloves, wearing unrestricted- toed shoes, and choosing a heat-resistant face, you can concentrate on the joy of grilling without fussing about accidents or injuries. Prioritize safety and enjoy your grilling adventures to the fullest. Safety Considerations When it comes to grilling safety, there are many crucial considerations to keep in mind to ensure a smooth and secure experience. First and foremost, always prioritize the use of heat-resistant BBQ gloves when handling the chimney stack starter and hot watercolor.
These gloves give essential protection against becks and allow you to maneuver the outfit confidently. also, make sure to wear unrestricted-toed- toed shoes while grilling to guard your bases against implicit accidents or injuries caused by open dears and hot shells. As you embark on your grilling adventure, it’s pivotal to elect a heat-resistant face to place the hot watercolor on when transferring it from the chimney stack starter. Concrete, ceramic penstocks, or paving monuments are excellent choices that can repel the violent heat.
Again, it’s inversely important to avoid ignitable shells in the vicinity to help any accidental fires. By being aware of your surroundings and using applicable shells, you can produce a safe grilling terrain that minimizes pitfalls and ensures a solicitude-free cuisine experience. Incipiently, maintaining a keen mindfulness of your surroundings and taking visionary safety measures is consummate when using a chimney stack starter for watercolor.
By clinging to these safety guidelines and enforcing stylish practices, you can enjoy the benefits of grilling with watercolor securely and effectively. Flashback, safety should always come first, so do not overlook these considerations as you fire up your caff and prepare for a succulent cuisine experience. Stay safe, stay watchful, and let the grilling fun begin!
Gathering Necessary Tools and Materials
Before you embark on your charcoal grilling journey, it’s essential to gather all the necessary tools and materials. Here’s a quick checklist to ensure you’re well-prepared for the task ahead:
Grill: Make sure your grill is clean and ready for use. Whether you have a charcoal or gas grill, having it set up and in good condition is crucial for a successful grilling session.
Charcoal: Choose high-quality charcoal that suits your cooking needs. Whether you prefer briquettes or lump charcoal, having enough on hand is key to maintaining the right cooking temperature.
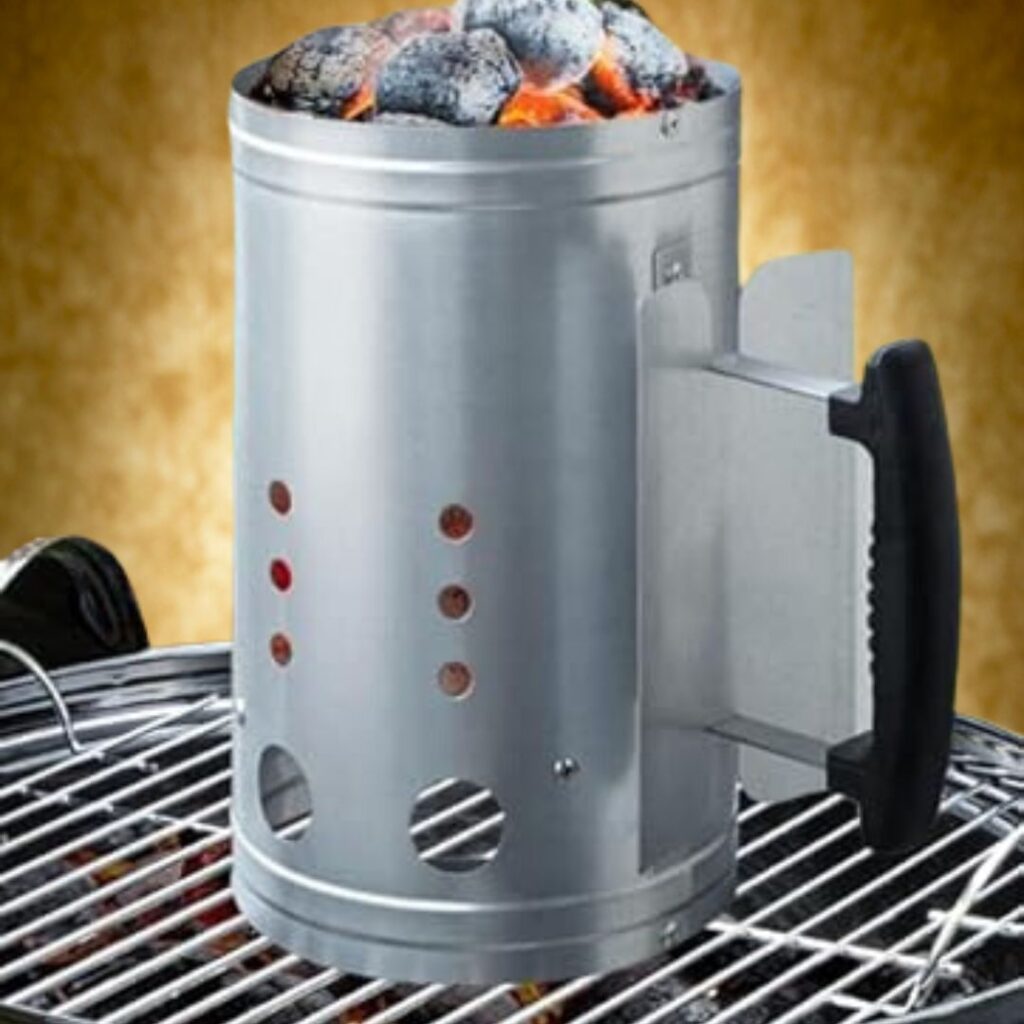
Chimney Starter: This handy tool is the star of the show. Make sure you have a chimney starter that is clean and free of any debris from previous uses.
Newspaper or Fire Starter: To ignite the charcoal in the chimney starter, you’ll need a newspaper or a fire starter. Ensure you have enough to get the charcoal burning efficiently.
Heat-Proof BBQ Gloves: Safety First! Protect your hands from burns by using heat-resistant BBQ gloves when handling hot charcoal or the chimney starter.
With these tools and materials on hand, you’re all set to kickstart your grilling adventure with a chimney starter. Stay tuned for the next steps in our guide on how to use this innovative tool for igniting charcoal like a pro. Let’s get that grill fired up and ready to cook up a storm!
Preparing the Grill
Before you can start grilling with your chimney starter, it’s essential to prepare your grill for the cooking process. Make sure your cooking grate is in place in your grill and that the bottom air vents are fully open. This step ensures that there is proper airflow, which is crucial for the charcoal to ignite and burn efficiently. Without adequate airflow, your charcoal may take longer to heat up, leading to uneven cooking or potential extinguishing.
Next, it’s time to get your hands dirty and load up the chimney starter with charcoal. The amount of charcoal you use will depend on your specific grilling needs. For those looking to cook hot and fast, fill the chimney to the top. If you’re planning on a low and slow cooking session or preparing a smaller meal, filling it about halfway should suffice. The right amount of charcoal will ensure the desired cooking temperature and duration for your grilling session.

After loading the charcoal, it’s time to ignite the flames. Place three balls of scrunched-up newspaper or a natural firelighter at the bottom of the chimney starter. Alternatively, you can place the firelighter onto the middle of your grill grates. Light the newspaper or firelighter, kickstarting the ignition process for your charcoal. This step is crucial to getting the charcoal heating up and ready for grilling in no time.
As the flames start to dance and the charcoal begins to heat up, it’s important to remain vigilant and wait for the coals to reach the desired temperature. Allow the charcoal to heat up for approximately 15 minutes, ensuring they turns red-hot and ashy. This waiting period is essential for the charcoal to reach the optimal heat level for a successful grilling experience. Patience is key to achieving that perfectly seared steak or juicy burger on the grill.
Loading the Chimney Starter
Now that you’ve gathered all your necessary tools and materials, it’s time to load up your chimney starter with charcoal. This step is crucial for ensuring a successful and efficient ignition process. Start by filling the chimney starter with the desired amount of charcoal based on your grilling needs. Whether you’re looking for high heat for quick cooking or a slower burn for a more relaxed meal, the amount of charcoal you use will determine the intensity of the heat.
Fill the Chimney Starter
When filling the chimney starter, consider the type of charcoal you’re using and the cooking style you prefer. For hot and fast grilling, fill the chimney starter to the brim with charcoal. This will provide intense heat for searing and quick cooking. If you’re aiming for a low and slow cooking experience or preparing a smaller meal, filling the chimney halfway will suffice. Finding the right balance of charcoal ensures that your food is cooked to perfection without any hot or cold spots on the grill.
Arrange the Charcoal
Once you’ve filled the chimney starter with charcoal, take a moment to arrange the pieces for optimal airflow. Ensuring that the charcoal is evenly distributed within the chimney will promote consistent ignition and heat distribution. By arranging the charcoal properly, you set the stage for a successful grilling session with reliable and even cooking results. Remember, the way you load the chimney starter can make a significant difference in the efficiency of the ignition process.
Consider Your Cooking Needs
Before lighting the charcoal, consider your specific cooking needs and adjust the amount of charcoal accordingly. Understanding how much heat you require and the cooking time involved will help you load the chimney starter appropriately. Whether you’re preparing a quick weeknight dinner or hosting a backyard barbecue, tailoring the charcoal load to your cooking needs ensures that you have the right amount of heat for your grilling adventure. By taking a moment to consider your cooking requirements, you set yourself up for a successful and enjoyable grilling experience.
Final Check Before Ignition
Before moving on to the next step, make a final check to ensure that the chimney starter is loaded correctly. Confirm that the charcoal is arranged evenly and that the amount aligns with your desired cooking intensity. By double-checking your work now, you can prevent potential issues during the ignition process and guarantee a smooth transition to the next steps of lighting the charcoal. With the chimney starter loaded and ready to go, you’re one step closer to enjoying a delicious grilled meal with friends and family.
Igniting the Charcoal
Let’s get that charcoal fired up! Here’s where the magic happens as we transform those cold coals into blazing hot embers, ready to cook up a storm. Follow these steps to ensure a successful ignition:
Place three balls of scrunched-up newspaper in the bottom of the chimney or use a natural firelighter.
Light the newspaper or firelighter to kickstart the ignition process.
Wait patiently as the charcoal heats up for around 15 minutes, turning red-hot and ashing over.
Once you see those coals glowing and ready to go, you’re one step closer to delicious grilled goodness. The beauty of using a chimney starter shines through as you witness the efficient and even ignition that sets the stage for a perfect grilling experience. Trust the process, and get ready to savor the flavors that await on your grill.
Waiting for the Charcoal to Ignite
Now comes the moment of anticipation—waiting for the charcoal to ignite. It’s crucial to let the coals heat up for approximately 15 minutes, allowing them to turn red-hot and ash over. This waiting period is where the magic happens, as the chimney starter works its charm to ensure an even and consistent burn. Be patient, grab a cold beverage, and enjoy the process as the coals reach their optimal cooking temperature.
As you wait for the charcoal to ignite, take a moment to appreciate the simplicity and efficiency of the chimney starter. Gone are the days of struggling with lighter fluid and unevenly lit charcoal. With this tool, you can sit back and relax, knowing that your grilling experience is in good hands. The controlled heat of the charcoal will soon be ready to infuse your food with that delicious smoky flavor you love.
During this brief waiting period, you might notice the enticing aroma of charcoal starting to fill the air. It’s a sensory reminder that good things are on the horizon: juicy steaks, perfectly grilled vegetables, and mouth-watering burgers. The slow process of heating the charcoal allows for a gradual build-up of flavor, ensuring that every bite of your grilled masterpiece is nothing short of perfection.
As the minutes tick by, resist the urge to rush the process. Trust in the chimney starter to do its job and ignite the charcoal to the ideal cooking temperature. Patience is key when it comes to grilling, and the reward of a well-lit, evenly heated grill is well worth the wait. So take a deep breath, soak up the ambiance, and get ready to unleash your culinary skills on the grilling stage.
Once the charcoal has reached its red-hot, ash-over state, it’s time to take the next step in your grilling adventure. With the coals primed and ready, you can confidently transfer them to the grill and kickstart your cooking journey. The waiting game is over, and now it’s time to savor the fruits of your patience and preparation. Get ready to create mouthwatering dishes that will impress your family and friends at your next backyard barbecue.
Transferring the Charcoal to the Grill
Now comes the exciting part: transferring the ignited charcoal to your grill! With your heat-resistant BBQ gloves on, carefully lift the chimney starter and pour the red-hot coals into the grill. The sizzle and crackle as the charcoal hits the grate signal the beginning of your grilling adventure. Take a moment to appreciate the glowing embers, knowing that you’re on your way to deliciously grilled food.
As the charcoal settles into the grill, replace the cooking grate on top to secure the coals in place. The sizzling heat from the charcoal beneath will start to envelop the grill, promising a perfect cooking environment. Don’t forget to put the lid on the grill to trap the heat and create the ideal setting for your culinary creations. The lid acts as your partner in heat retention, ensuring that your food cooks evenly and thoroughly.
With the charcoal in place and the lid on, it’s time to let the grill preheat. Allow the BBQ to heat up for another 5–10 minutes, giving the charcoal a chance to reach the desired cooking temperature. As you wait, the anticipation of the flavorful dishes you’re about to create builds. The grill becomes a stage for your culinary skills, ready to turn raw ingredients into mouthwatering delights.

Once the grill is preheated and the charcoal is at its optimal temperature, you’re all set to start grilling. Adjust the lid and bowl dampers as needed to fine-tune the heat intensity for your specific cooking requirements. Whether you’re searing steaks or slow-cooking ribs, the controlled heat from the charcoal will work its magic, infusing your food with that irresistible smoky flavor. Get ready to enjoy the fruits of your labor as you savor every bite hot off the grill.
Replacing the Cooking Grate and Putting the Lid On
Now comes the crucial step of replacing the cooking grate and putting the lid on your grill. Once the ignited charcoal is safely transferred, carefully position the cooking grate back onto the grill. This step is essential as it provides a stable surface for your food to cook evenly and allows for that delicious smoky flavor to infuse.
After securing the cooking grate, don’t forget to put the lid on your grill. The lid serves a vital role in trapping heat and creating a convection effect that ensures your food cooks thoroughly. By enclosing the grill, you’re creating an environment conducive to grilling success, allowing the flavors to meld and intensify as your meal cooks to perfection.
With the cooking grate in place and the lid securely on, you’re one step closer to enjoying a mouth-watering grilled feast. The lid helps maintain a consistent temperature inside the grill, which is crucial for achieving the desired char and tenderness in your food. So sit back, relax, and let the grill work its magic as you anticipate the delicious flavors that await you.
As the grill preheats and the charcoal reaches its optimal temperature, take a moment to appreciate the sizzle and aroma that fill the air. The combination of heat, smoke, and anticipation sets the stage for a culinary experience like no other. So adjust the temperature to suit your cooking needs, and get ready to create memorable meals that will tantalize your taste buds.
Preheating the Grill
Now that your charcoal is ignited and ready to go, it’s time to preheat your grill. This step is crucial to ensuring that your cooking surface reaches the desired temperature for that perfectly grilled meal. Simply wait for another 5–10 minutes after pouring the charcoal into the grill. This brief preheating period allows the BBQ to get to the ideal cooking temperature, setting the stage for a successful grilling session.
As you patiently wait for your grill to preheat, take a moment to envision the sizzle of your favorite foods hitting the hot grill. This anticipation builds excitement for the delicious meal that awaits. The preheating process is like the calm before the grilling storm, where the heat builds up, ready to sear your meats and veggies to perfection. So, embrace this moment of preparation, knowing that each minute brings you closer to culinary bliss.
During the preheating phase, you may notice wisps of smoke rising from the grill, signaling that it’s reaching the optimal temperature. This visual cue is a reassuring indicator that your grill is heating up efficiently and getting ready to work its magic on your ingredients. So, pay attention to these subtle signs and get ready to unleash your grilling prowess as the heat intensifies within the BBQ.
Once the preheating is complete, it’s time to unleash your culinary creativity and start cooking. With your grill now at the ideal temperature, you have the green light to place your marinated meats, seasoned veggies, or whatever culinary delights you have in store onto the hot grates. The preheating process has set the stage for a successful grilling experience, so dive in and let the flavors sizzle and the aromas tantalize your taste buds. Get ready to enjoy a meal that’s been cooked to perfection, thanks to the careful preheating of your grill.
Adjusting the Temperature
Now that your charcoal is lit and your grill is preheated, it’s time to adjust the temperature for the perfect cooking conditions. This can be done by adjusting the air vents on your grill. Opening the vents will increase the airflow, raising the temperature, while closing them will decrease the airflow, lowering the temperature. Remember to monitor the temperature throughout the cooking process to ensure your food is cooked to perfection.
In conclusion, using a chimney starter for charcoal is a game-changer for any grilling enthusiast. Not only does it make the process safer and more efficient, but it also leads to better-tasting food. By following the step-by-step guide, considering the benefits, and keeping safety in mind, you can master the art of using a chimney starter for charcoal. So, next time you fire up the grill, ditch the lighter fluid and reach for your chimney starter for a hassle-free and delicious grilling experience. Happy grilling!

FAQ
What are the benefits of using a chimney starter for charcoal?
Using a chimney starter for charcoal offers several benefits, including a safer ignition process without the need for lighter fluid, a more even distribution of heat for better cooking results, and greater efficiency in getting your grill ready for cooking.
What safety considerations should I keep in mind when using a chimney starter for charcoal?
Safety is crucial when using a chimney starter for charcoal. Always place the chimney starter on a heat-resistant surface, use heat-resistant gloves when handling it, and never add lighter fluid once the charcoal is already ignited. Additionally, make sure to keep children and pets away from the hot grill.
What tools and materials do I need to use a chimney starter for charcoal?
To use a chimney starter for charcoal, you will need the starter itself, charcoal briquettes, a heat-resistant surface for the starter, matches or a lighter, and, optionally, heat-resistant gloves for handling the hot chimney starter. These tools and materials are essential for a successful grilling experience.
As an Amazon Associate, I earn from qualifying purchases.